 Understory
How Understory works
Understory combines the best parts of an outliner with the best parts of a regular, document-based notes app. Outliners are good for shaping ideas into a hierarchy, and document-based apps are good for writing prose. Understory gives you both: you write notes as regular paragraphs of text, and you arrange those notes into an outline.
Notes and subnotes
A note is just text. You don’t have to come up with a title or a filename before you can start writing, so getting something down takes one shortcut: hit ⌘N and type.
Once you’ve created a note, you can add subnotes to it whenever you need them. Subnotes can have subnotes of their own, so a note grows into a tree of related ideas. Each subnote is still a whole note, with its own text, links and attachments.
This might sound like a traditional outline, but the relationships between notes aren’t fixed. A subnote can be an aside, a footnote, a supporting argument, or simply an idea you want to keep nearby. You use the tree to put related ideas next to each other, without folders to create or a web of links to manage.
Not every idea needs a home right away. You can create a note and leave it on its own, which makes Understory useful for the ideas you want to capture now and figure out later. When you do find a place for one, it’s easy to add it to a tree.
The same note in more than one place
The same note can appear in more than one tree. Say you’re reading a book and taking notes under a note for that book. The book’s note might belong in your Books I’m Reading list, and you might also want it under Research for My Paper. You don’t have to duplicate it. You put the same note in both places, and an edit in one shows up in the other.
When a note appears in more than one tree, Understory shows it in italics so you can see that it’s shared. Press ⌘G to jump to the next place that contains it.
The same idea connects a single note to many subjects. A note about the phrase “the medium is the message” might belong alongside several different topics. Instead of copying it, or trying to remember where you first wrote it, you add it as a subnote wherever it’s relevant. The note becomes a kind of portal between different neighborhoods of your ideas.
Finding your way around
The note browser always shows one of two things: a list of notes, or the tree around the note you’re viewing.
Search is fast, and matching notes appear in the browser as you type. Select a result and press the Right Arrow to go straight to that note’s place in its tree. Press the Left Arrow to return to your results, then move to the next one and see where that note lives. You can do all of this from the keyboard.
Step 1. Collect
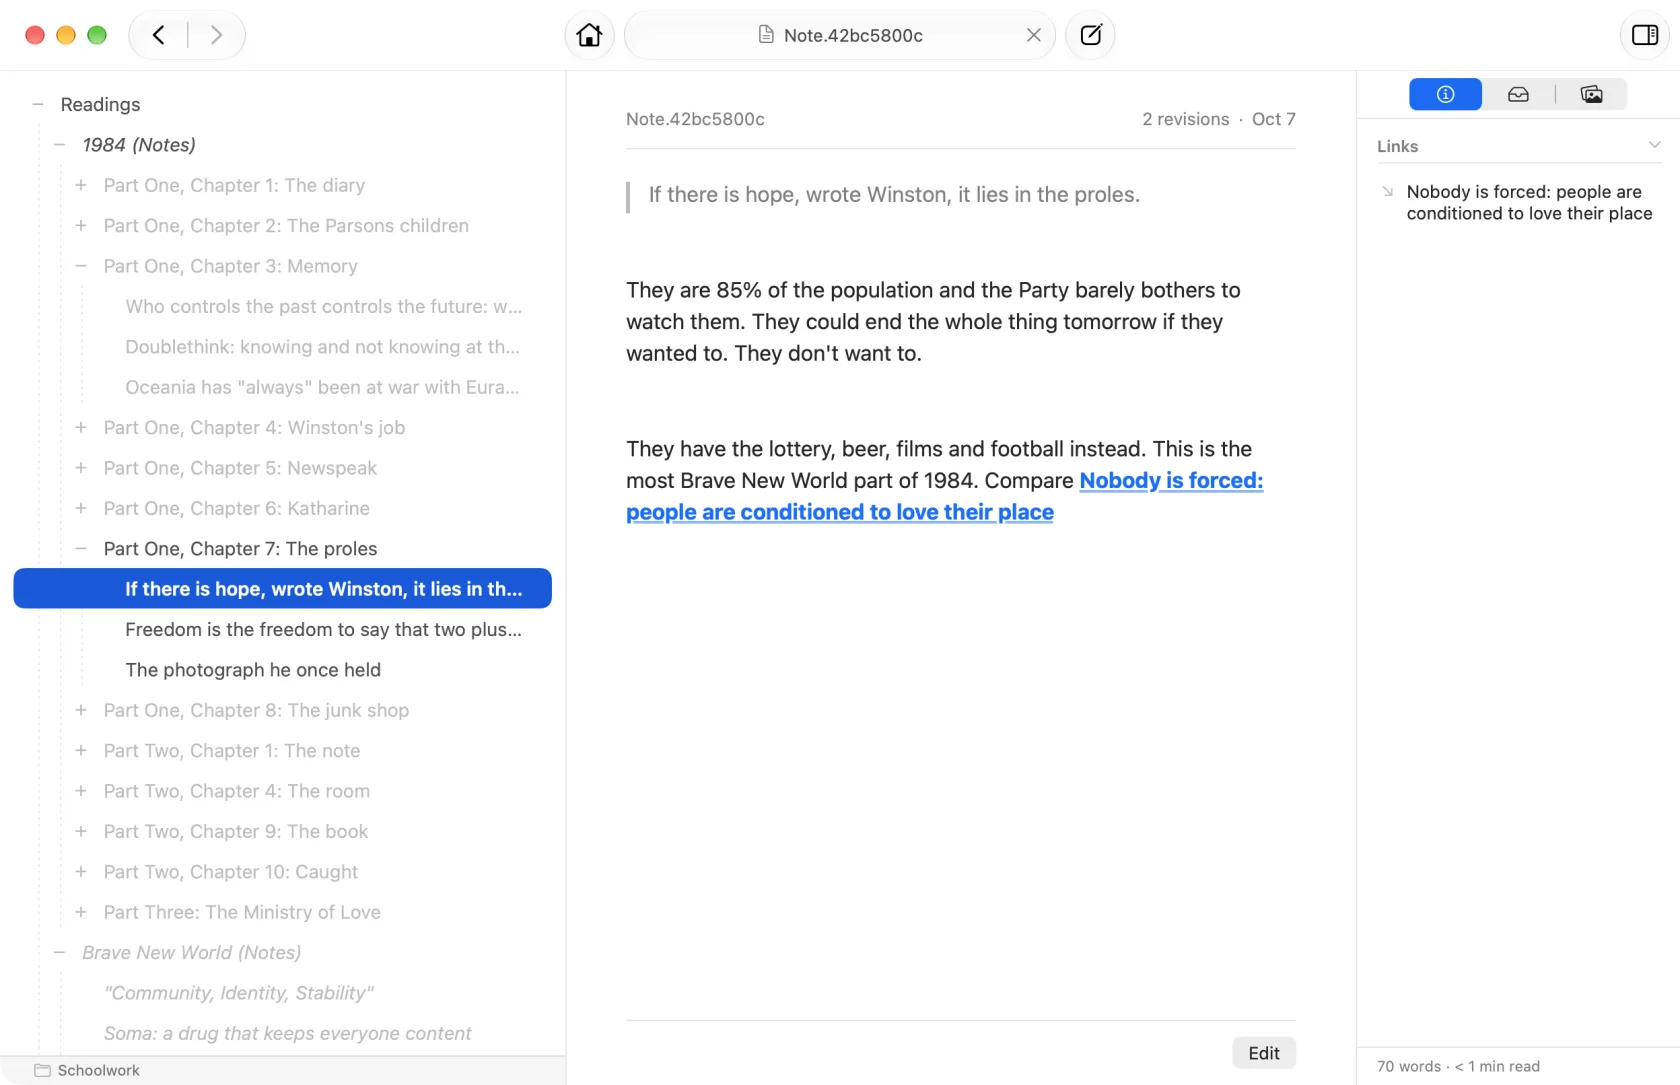
Take notes as you read, chapter by chapter.
Start a note for the book, add a subnote for each chapter, and give each quote or idea a short note of its own under the chapter it came from. You can capture ideas as they come without stopping to organize them perfectly.
Drag in a PDF or an image and it attaches to the note it belongs to. When one note reminds you of another, link them right in the text. Links work in both directions, so you can always find your way back.
Step 2. Outline
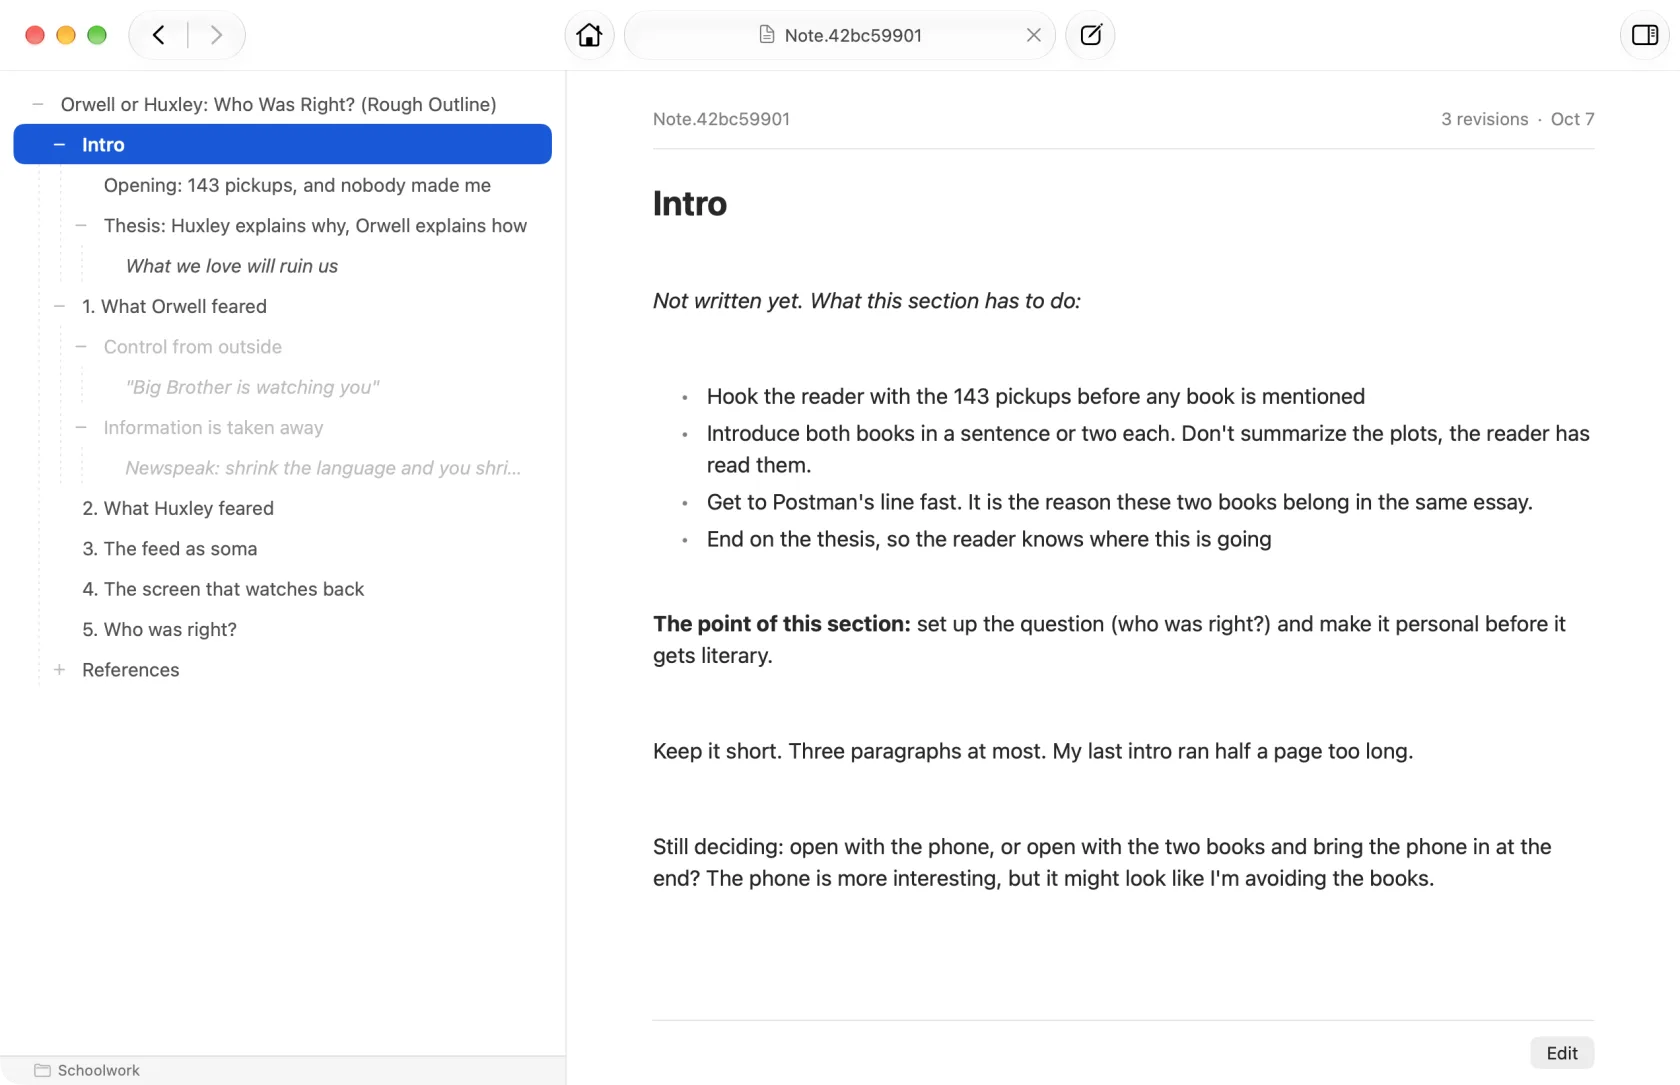
Build your argument from the notes you took.
When you’re ready to write an essay or a research paper, create a new tree and use it to shape the argument. Start a note for the piece and add a subnote for each of its main points. Then paste the notes you’ve already taken underneath the points they support, so your research sits right beside the ideas you’re developing.
Nothing is duplicated along the way. A quote stays under its chapter in your reading notes and also sits under the point it supports.
Jump between the subnotes to compare arguments, quotes and supporting ideas, and move things around until the structure works.
Step 3. Write
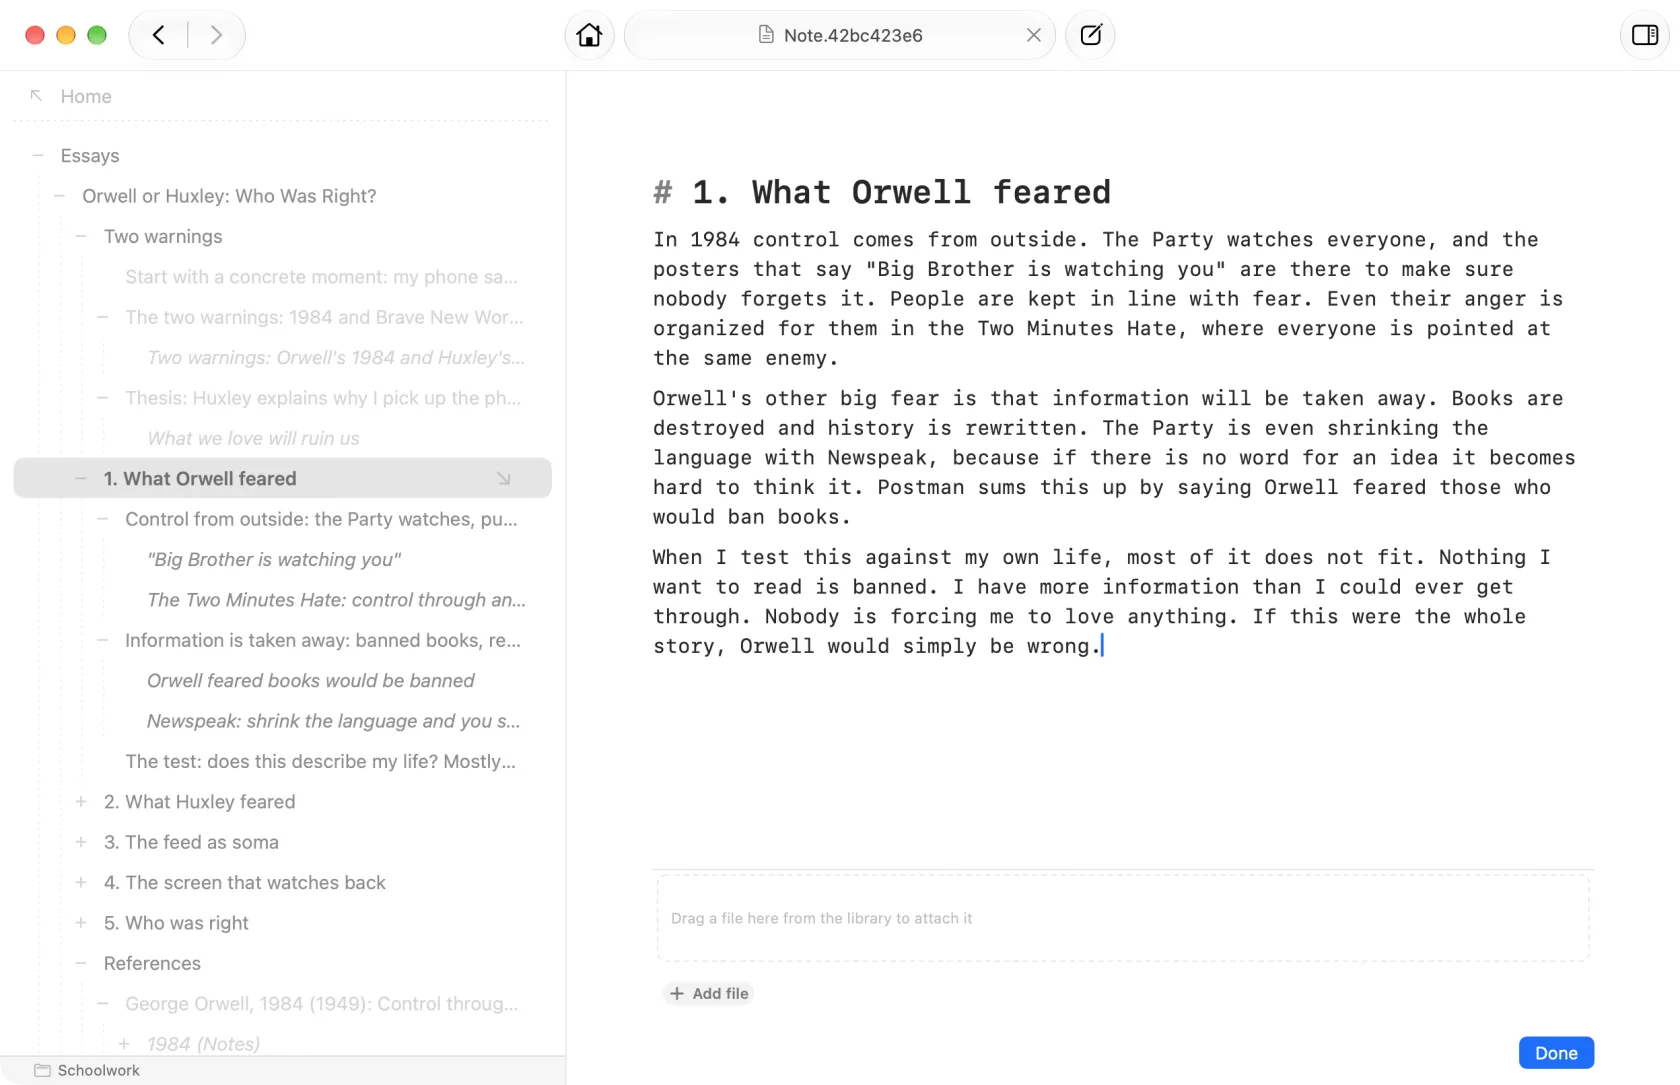
Draft each section with your notes at hand.
Each main point in your outline is a note, so that’s where the draft goes. Open one and write in plain Markdown, with its supporting notes listed right beneath it.
When you want to read the whole thing as a piece of writing, collapse the subnotes and select the main points. You have your narrative from beginning to end, with a word count beside it.
Every version of a note is kept. Rewrite a paragraph a dozen times and the earlier drafts are all still there, so you can look back at what it used to say.
Publish
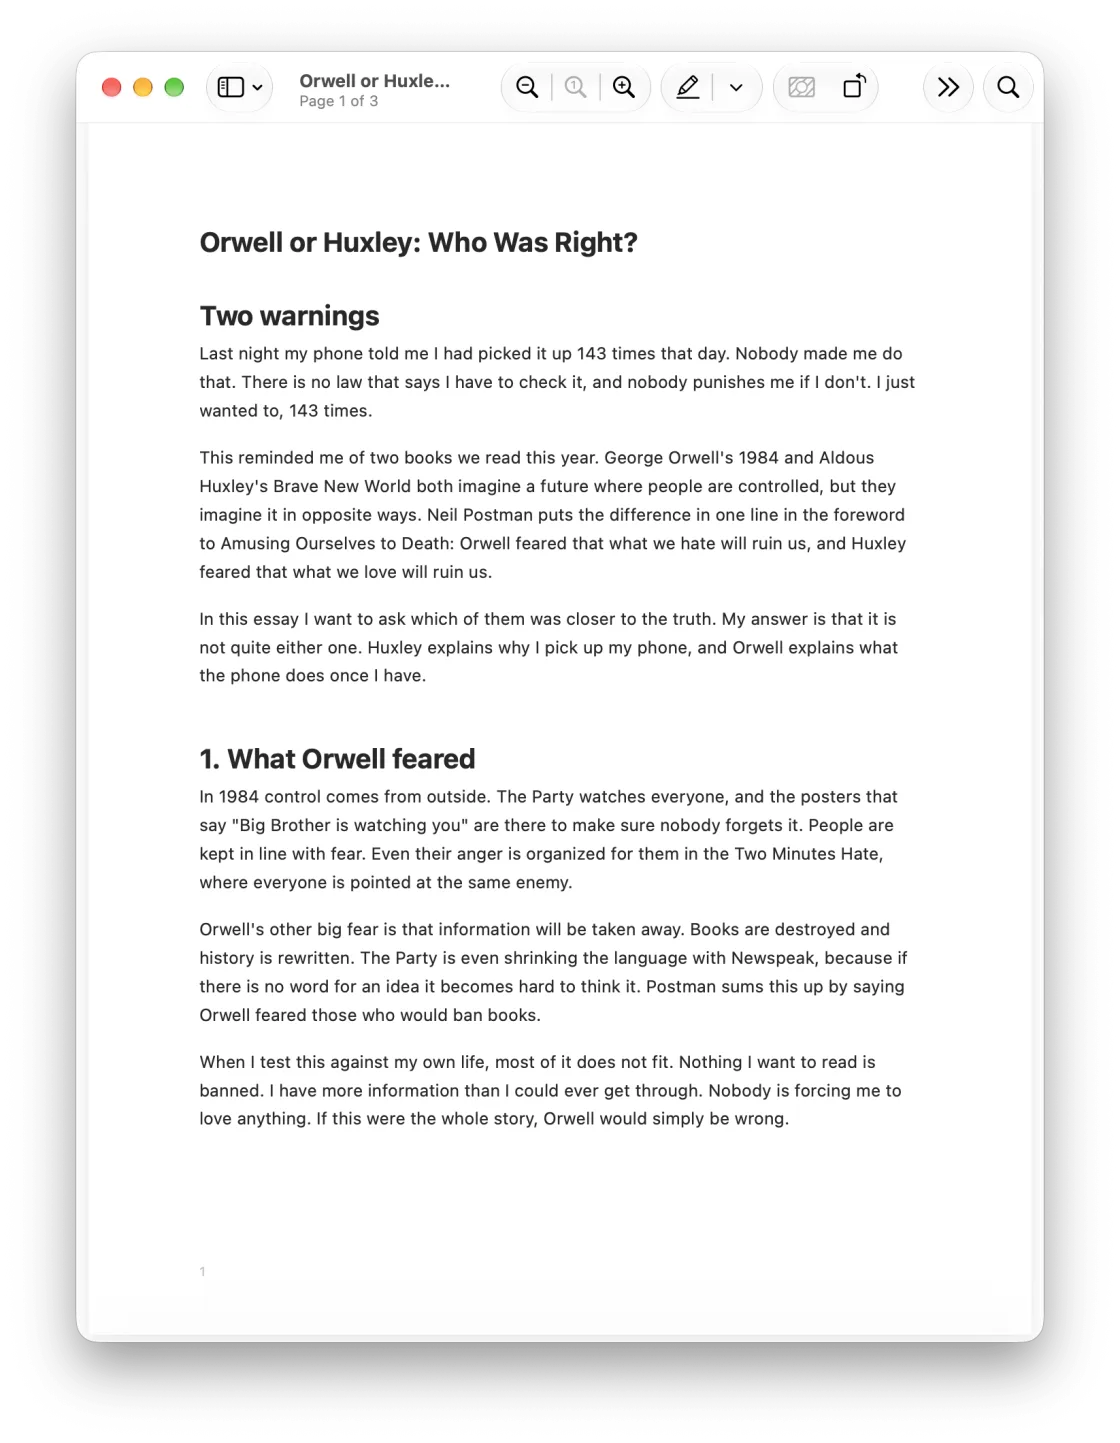
Turn your outline into a document you can share.
Select the sections you’ve written, or a whole outline, and publish them as one document in the order you arranged them:
- PDF, with bookmarks and page numbers, in US Letter or paperback and hardback book sizes
- Rich Text, to finish in your word processor
- Markdown, for your blog, your static site or another writing app
- A website, ready to open in any browser or put online
Use it as it is, or carry it into the tool you finish in. You can print it, too.
Get Understory
Download Understory on the Mac App Store.
It’s free to try, and every feature works from the first launch, publishing included. A one-time payment removes the limit on how many notes a notebook holds, and the pricing page has the details.